The Fantasy Art of Ksheyna Nightswood


Making Cloth
Art Doll Wings.
These tutorials are for personal use only

Supplies needed:
Sheer Fabric - such as organza
Coloured craft wire - I am using a 24ga wire
3D paint
Craft Glue - clear and fast drying
Wire cutters and pliers
Scissors
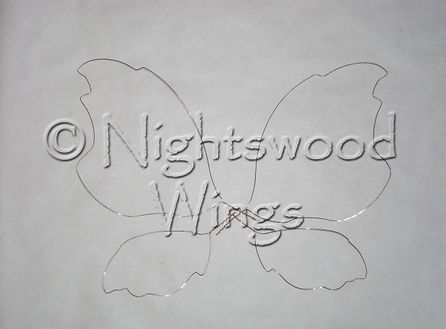
Start by taking the wire and create a loop roughly to the size you want the top wing to be, cut 2 pieces to this length. Create another loop smaller then the first, roughly to the size you want the bottom wing to be and cut 2 pieces. You should now have two long and two shorter pieces of wire. Take one piece of wire and bend to form a loop then twist the ends together to create the stem. Repeat with the other 3 pieces of wire.


Holding both the larger loops together gently bend and shape the wire to create the wing. Repeat with the smaller loops. You can create any shape you want. If you make a mistake just smooth out the wire with your fingers, pliers can be used to flatten out any kinks.

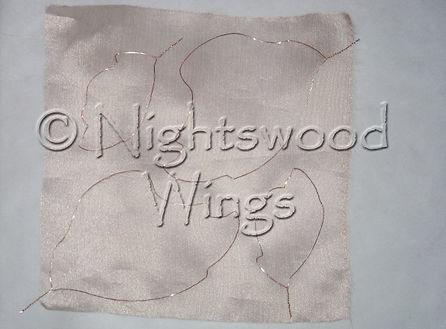
Once you have your wing shape apply a thin layer of glue to one side of the wire and gently press it down onto your chosen material. Set aside and allow them to dry. Once fully dry cut away the excess material from around the wire.

Using the 3D paint carefully outline each wing and add the veins. You can always trace the outline of the wing onto a scrap piece of paper to try out a pattern before applying them to your wings.Once the paint is dry you can gently twist the left wings wire stems together to create an adjustable wing. Repeat with the right wing.


Have Fun!!
If you have any questions about this Tutorial please do not hesitate to contact me.
